sven
Full Member
  
Posts: 166
|
Post by sven on Jun 19, 2008 12:51:13 GMT -5
He really has an interesting process. Glass pearl blasting.  ;D |
|
|
|
Post by singlespinner on Jun 24, 2008 22:05:21 GMT -5
Some automative tool shops sell stud removers and they work really well
but are a bit expensive for a tool you would use about once every 10 yrs
Singlespinner
|
|
wmd
New Member
 sr500 buell x1 gasgas ec250 kawasaki z200
Posts: 27
|
Post by wmd on Jun 25, 2008 2:55:15 GMT -5
as for the studs
try a set of stilsons or footprints (pipe wrench) if you plan on replacing them, or put three nuts on the stud and lock them together then undo it from the middle one.
PS i have not had my sr motor apart so i am no expert
|
|
|
|
Post by fenz on Jun 27, 2008 0:26:05 GMT -5
Last motor i pulled down the barrel studs were very stuborn.
Get a hold of the stud in a good vice(away from the thread of course) and then swing on the barrel to try and get them to release.
Go easy though you dont want to break those suckers off or strip out the alloy.....
|
|
|
|
Post by boanerges on Jun 29, 2008 18:31:51 GMT -5
Thanks for the tips guys. I finally got the studs out. My biggest concern was snapping off the studs from too much bending moment. I was basically using the lock nut techniques although I could only get two nuts on and not three. However tightening them together produced a good enough "lock". I just couldn't get an axial torque on the stud with a box end wrench, by the time I got near to what I imagined the required torque was going to be, the stud was in A LOT of bending. So, I went back to the tool box and remembered a "pass through" ratchet set I bought a while back to get nuts off the struts on my Subaru. Here is a shot of the Kobalt ratchet.  So I passed the ratchet over the stud then tightened the nuts together on the studs. After engaging the ratchet on the locked nuts I was able to get a nice axial torque but still needed an extension. Unlike the box-end the ratchet setup allowed me to pass a nice length of 3/4 pipe over the ratchet handle. Now some are sure to scold me for using a ratchet as a breaker bar, but hey -- it popped all three stubborn studs off with ease. The "persuader" pipe allowed me to apply a nice smooth torque on the studs with very little bending. The lead mechanic demonstrates the technique without a persuader using six brand new studs as an example   BIke is coming along otherwise, new alloy swingarm from trouthunter and the wire hubs are getting cleaned up and ready for building up |
|
sven
Full Member
  
Posts: 166
|
Post by sven on Jun 30, 2008 11:09:01 GMT -5
...you would have got em out much easier if you followed my advice...
|
|
|
|
Post by boanerges on Jun 30, 2008 13:07:36 GMT -5
Hehehe...just reread your reply scm ... didn't understand the advice first time around . I believe thats a picture of a torch for heating the studs? If so, yes we tried heating the studs -- wasn't enough, heating the entire assembly -- not enough. Heating and icing the stud -- nope...
Maybe the sum of all this messing around finally did make the difference though. However, I felt much more comfortable torquing on this thing with the gizmo we used that finally cracked the studs free.
Thanks for the advice anyway though...
Bill--
|
|
|
|
Post by StewRoss on Jul 2, 2008 2:08:31 GMT -5
Bill, Your mechanic is doing well there...heh, heh...good instructional technique.... SR  |
|
|
|
Post by weside on Jul 3, 2008 11:28:21 GMT -5
(stud removal) maybe next time you can try bending the stud in half with the round part of a cresent wrench.and twist off by hand. i bent mine real close to the case,about a inch or so. this is if your getting new ones.
great job so far. looking forward to seeing progress.
RACERTON.COM
|
|
|
|
Post by boanerges on Aug 2, 2008 0:26:30 GMT -5
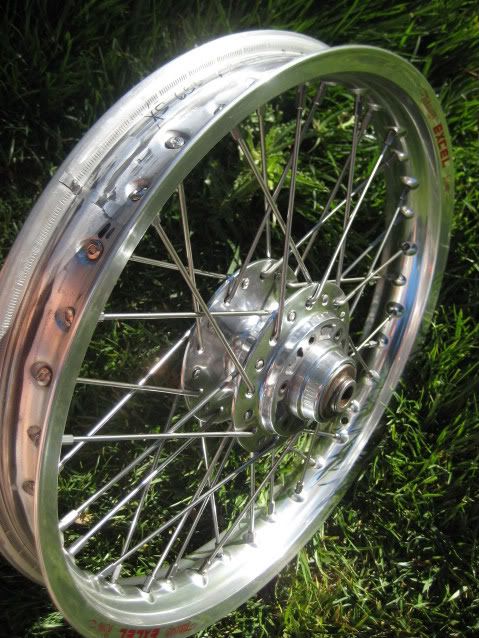
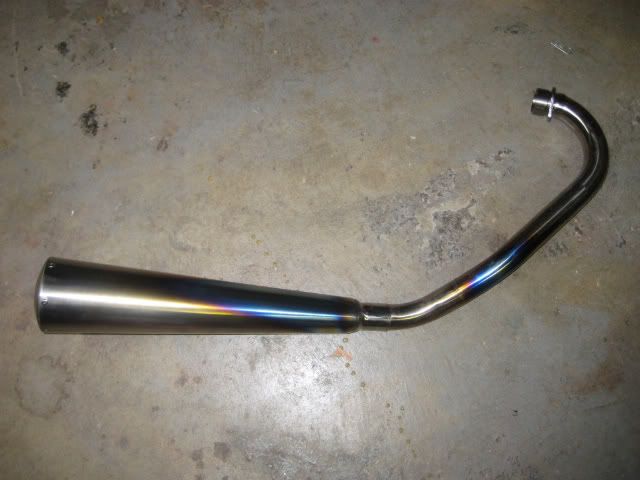
Well, its been a while. The MotoGP got in the way of progress ;D Wow, what a race. Watched the race from up on the corkscrew, saw Rossi kiss the asphalt after his win. Condolences to Stoner and all my Australian friends/Ducati fans on the board, but what a race for the first 15 laps or so!!! But the lead mechanic and I have been making progress. Here are some shots of the wheels we are building. XS 650 front hub and XT500 rear polished in San Jose by Reliable Polishing. Rims are Excel, stainless spokes and nipples from Buchanans. All new bearings and seals front and back.     The lead mechanic showing off his handywork. We now also have an Over Racing Titanium Exhaust. Sweet unit. Of course we haven't heard it yet, anyone on the board have any experience with this exhaust?  We also have an alloy swingarm from Trouthunter. Run into a couple issues already outlined other places on the board. Basically, the passenger pegs interfere on the left side. Was going to have to modify the passenger peg mounts anyway for the Peyton Place rearsets. They were not fitting up properly. Will keep you posted on what this turns out like. Another Alloy Swingarm issue was with the Ohlins shock mount. Basically, the shocks (Ohlins 36p) bottom spring retainer interferes with the swingarm. Looks like I can get around this with a bit of a spacer under the spring retainer. Needs about 2mm I think (rough guess). This gives a little more preload but no big deal at all. Hope to start the engine build in the next week or so. All the best everyone, will keep you posted. Bill-- |
|
chase
Junior Member
 
Posts: 35
|
Post by chase on Aug 3, 2008 1:39:25 GMT -5
Haven't had any experience with that exhaust but would love to hear how it goes! That thing looks like a beast!
Keep up the good work on that build! It's looking top rate!
|
|
|
|
Post by StewRoss on Aug 3, 2008 3:24:17 GMT -5
Hi Bill, Good work...nice wheels...got a good pic of the centre of the front hub at all? Keep us informed... SR  |
|
|
|
Post by boanerges on Aug 3, 2008 22:07:27 GMT -5
Hi Stew: Here are a couple pictures of the front hub. Not sure what part you wanted to have a look at, the region between the left and right set of spokes or the plan view looking down on the axle hole. Here are views of both:     Just let me know if there is anything else you would like to have a look at. Still need to polish the aluminum cap that fits over the extra disk mounting holes. I plan on mounting a reacetech disk on to the wheel. Saw the composite ones at Laguna ... WOW are they light! Amazing.... Bill-- |
|
|
|
Post by StewRoss on Aug 4, 2008 1:43:43 GMT -5
Thanks Bill. I have a hub like this one but for a single disc...it's from an RD Yam.   I am fitting it to my DCM...one day when I get the time and inclination...thanks for the pics. I can see I'm going to have to spruce up the polishing a bit more... I want to get a TZ front caliper for it as well...or one of the AP Racing twin piston ones... SR  |
|
|
|
Post by boanerges on Aug 5, 2008 0:14:32 GMT -5
Interesting hub. Have you tried AP calipers before? I am thinking of using one for my front also. Seem to be the slimmest 6 pot caliper of the ones I have seen. Their Web Site has some nice dimensioned drawings. From what I can tell so far, the 6 pot should fit right in with my new XS650 wheel. Going to make up a wooden model from the drawing to test for clearance before I do anything rash though. If all goes well, should be a AP 6 pot on a Racetech (Ferodo I think) composite disk. I was absolutely sold on these disks after seeing them at the Ferodo stand at Laguna Seca.
Gotta say it would be hard to compete with Gary at Reliable when it comes to polishing. The guy has been making aluminum shiny since 1962! He has some great pictures of an airstream trailer he buffed out.
One of the greatest thing about this project has been getting the opportunity to meet many of the original California hot-rodders/builders and enthusiasts.
Cheers
Bill--
|
|